1. Setting up the Game
Firstly, any player joining must use the non-steam version of the game.
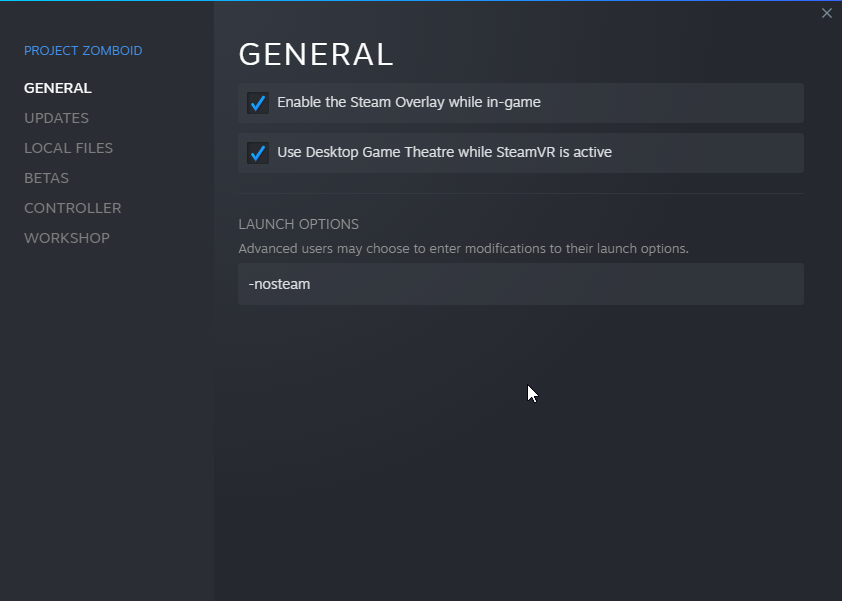
To get this, right click on Project Zomboid on Steam > Properties > type in -nosteam in the launch options. It should look like this:
2. Setup the server.
I recommend following this steam guide because it also redirects to other helpful links for setting up a Project Zomboid server.
Note that when it tells you to edit the StartServer64.bat with a text editor, edit StartServer64_nosteam.bat instead, as you will be using that.
You do not need to open any ports so ignore those instructions, just follow everything under How to create a Steam dedicated server (on your PC)
3. Open the Custom UDP port on playit.gg.
You can follow this guide by another playit user, just use port 16261 instead.
4. Launch the server
After all that, launch StartServer64_nosteam.bat. It takes a while, so give it time.
5. Connecting to the server (Local)
To connect to your server, you need to use your IPv4 address with port 16261.
You can find your IPv4 address by opening command prompt, typing ipconfig and scrolling down to the bottom.
On Project Zomboid, click on Join, and enter your server details on the right side.
5. Connecting to the server
For others to connect to your server, they must use the IP and port that playit provides after you complete step 3. Should be plenty straightforward.
On Project Zomboid, click on Join, and enter your server details on the right side.
