Decided to make a guide as some people might not know how for windows10 mainly windows 11 is pretty much the same except some settings in the os being a bit different.
Creating a minecraft java tunnel
First go to playit,make an account if you have not and verify your account.
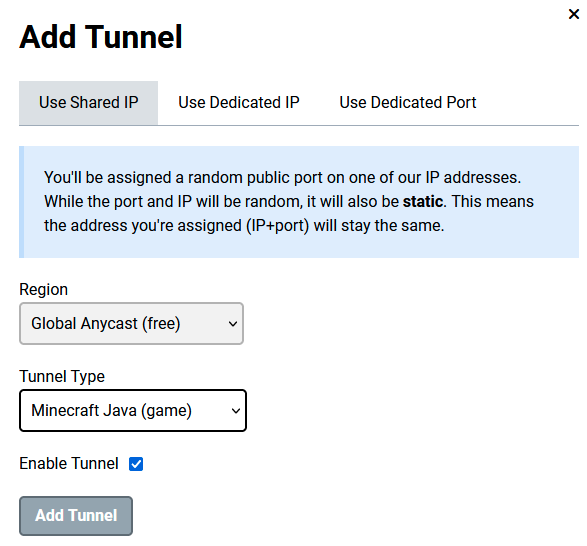
Click tunnels, add a tunnel, select tunnel type minecraft java, click add tunnel
Downloading server jar
Go to https://mcversions.net/ where you can find any version of server jar files.
For this demo just download 1.21.5 [You can choose any version you would like, however you need to make sure to use the correct java version for the version that you have chosen. ]
Click Download Server Jar
Making a folder for server jar and playit
Make a folder on your desktop and put the server jar inside as well as playit for easy access
Download the latest version Make Your Game Server Public - playit.gg
Set routing for the playit program
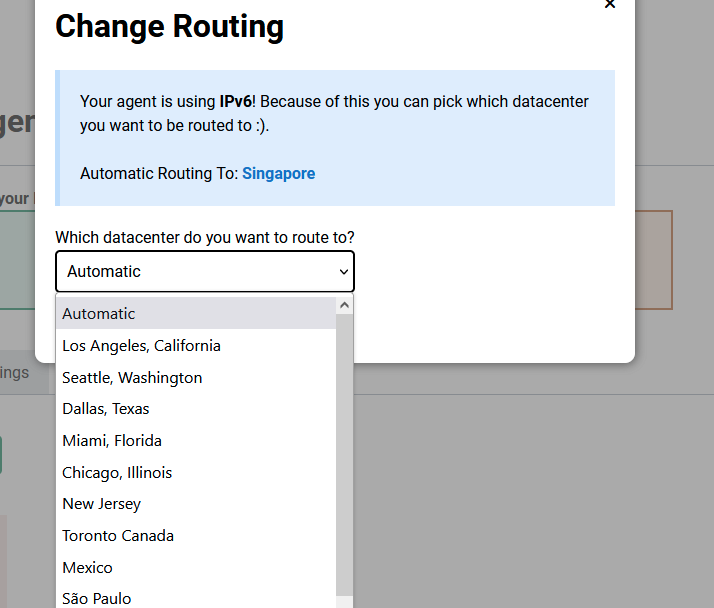
As of Version 0.15.26 Patrick the owner added the option to set region routing if you have ipv6 on your device
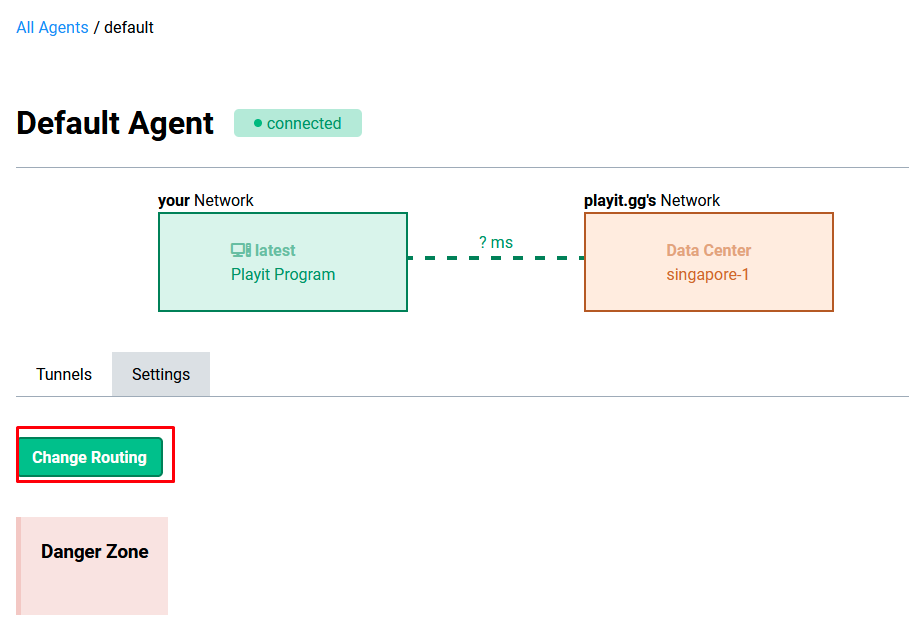
Go to agents and click on default agent. Click on settings, click change routing, select which datacenter you like and click update routing.
If you are unsure if you have ipv6, you can go to https://test-ipv6.com/ to test if you have ipv6.
If you do not have ipv6 you are unable to set routing. You can search online on how to enable ipv6 on your pc and router.
Making a bat file to run server
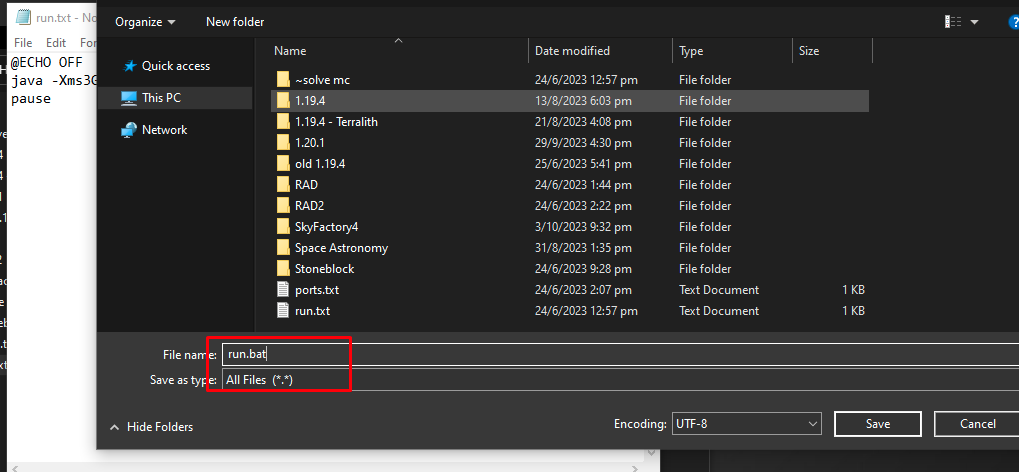
Now you need to make a bat file to run your server. Make a text document (Notepad) in the same folder as your server, paste this in @ECHO OFF
java -Xmx3G -jar fabric-server-launch.jar nogui pause
with out the ’ follow according to the picture.
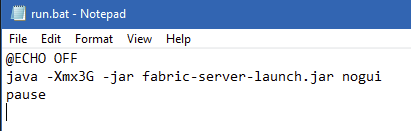
click save as, save file type as all files, name the file run.bat
Saving as .bat file format is important so name the file however you like
1st time running server
Now run playit and the run.bat file.
It should prompt you to agree to EULA. Close the cmd, open EULA.txt in your server file set to true and save.
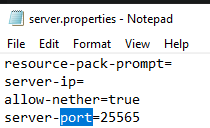
Server properties file you are able to change many things related to the game however do not change the following, server-ip= & server-port
After EULA set to true run your server again.
Setting ur local ipv4 ip and port number
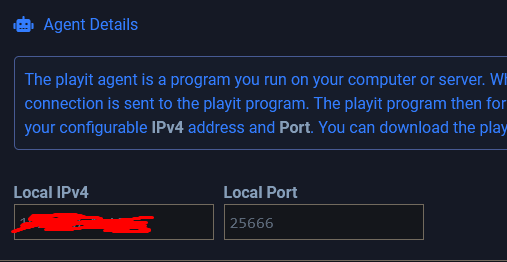
Now go back to playit website and adjust your tunnel. Click on your tunnel and set local ipv4 as your ipv4 ip.
You can do so by running cmd as admin and type ipconfig to find your ip, it should be called IPv4 Address.
When copy and pasting your IPv4 address from cmd to the playit website make sure to delete the invisible space at the front of the first number
Example |127.0.0.1 vs 127.0.01
| for this context is the invisible space which will cause an error on playit website so the best is to manually type out your ip as you see from cmd
Default port for minecraft is 25565 however if you want to change this you can but make sure to do so in the server properties file as well, its called server-port.
Testing
After that try and connect to your server with both your local ipv4 address and the playit address, it should work.
Use the [name] address to connect to your server (it would be like test.craft.ply.gg)
You can use the IP address to connect as well but make sure to put the port number (127.0.0.1:59991) as example 59991is my port number so replace with whatever your port number is shown

This is your tunnel details where you can copy the name address and ip address both works
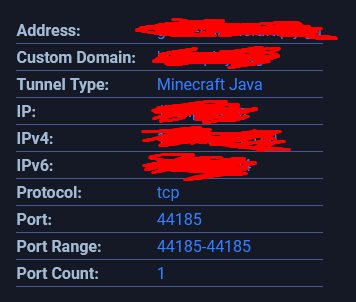
This port number is different from the tunnel details port number
This local port number is for server so make sure it is the same number as in the server.properties file
JAVA INFO
A quick search on google should help you find out what java version is needed to run a certain version of minecraft.
For example 1.12.2 you need java 8. I download java JREs from https://adoptium.net/ as it is easier to find also install 64bit.
To check type java in search bar on windows, click configure java or check for updates then click on java tab and click view as seen in attached screenshot. Download whichever is needed and enable.
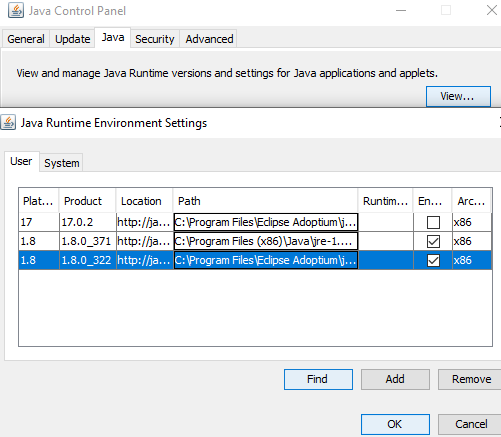
Make sure to Press Find and navigate to C:\Program Files\Eclipse Adoptium\jre-???\bin
jre-??? is whatever version number for my case as an example would be
C:\Program Files\Eclipse Adoptium\jre-21.0.6.7-hotspot\bin
and click next it will find java.exe and make sure there is a tick in the box to enable it
Example of run.bat file for 1.12.2 would be like this
@ECHO OFF
“C:\Program Files\Eclipse Adoptium\jre-8.0.322.6-hotspot\bin\java.exe” -Xms4096M -Xmx4096M -jar forge-1.12.2-14.23.5.2860.jar nogui
pause
This example is running the skyfactory4 modpack
![]()
Replacing java with ’ “C:\Program Files\Eclipse Adoptium\jre-8.0.322.6-hotspot\bin\java.exe” ’ is telling it to use the java in the location you pointed to instead of the default java that is installed on the system which would be the latest version in most cases
Misc
You can use papermc which is better in terms of performance compared to vanilla minecraft which have mod support
Since papermc is based of Spigot, you only can use plugins that are Spigot or Bukkit. As always google is your friend to find out more! :>
https://dev.bukkit.org/bukkit-plugins
Modded servers
For modded server you need to install forge/ whichever you choose on both the client and server and all of the users need to have forge installed as well as all of the same mods.
Most likely you are download a modpack so you do not really have to do the above step unless you are making your own, it is pretty much the same but just with a modloader such as forge/fabric and your choice of mods.
Optimization for your minecraft server
*Xms is minimum amout of ram used and Xmx is maximum amount of ram used. In this case I have set it to use 3 gigabyte of ram used. For modpacks can use up to 10gb, google and the modpack details are your friends in finding this out *
If you see in your server cmd something like running behind ticks if is above something like 1000 ticks add more ram, it means the server is lagging behind. However you should add more ram when there are multiple reports of your server lagging, other issues can cause this as well such as your wifi or cpu.
ERRORS
You might not have linked your playit agent to the website to resolve this you can delete the playit.toml file which will prompt to link the agent to the website which can be found C:\Users\user\AppData\Local\playit_gg
There are lots of reasons to why when you connect to your server you get timed out, loading to server and seeing the void. These issues could be due to your internet speed, if you have say less than 50 up and 50 down and other issues like too little ram allocated to the server.
You can try joining your server by direct connection or localhost to see if it works as your ISP might be blocking playit.
That’s the end of the guide.
Thanks for reading!
If you need help you can ask the members in the playit discord server